In part 1 I went through choosing the GPU. This part is how to get it working on Linux.
What this guide covers
- The driver - the kernel module plus userspace libraries and a few tools
- Secure Boot signing
- The Container Toolkit and CDI - to use the GPU in Docker or Kubernetes containers
- Monitoring - quick check with NVIDIA tools and Prometheus exporter for long-term graphs
Installing drivers on Linux
Option 1: Debian-provided driver
I use Debian, which provides nvidia-driver package. I tried this option first, until it turned the driver is a bit dated (version 550) and the latest CUDA doesn’t work with it. And in turn, some apps fail to run with an older CUDA. The usual compatibility problems you get with NVIDIA.
But, if you don’t need a recent CUDA, this option is easier. First, you need to enable contrib and non-free-firmware sections of Debian’s standard apt repo.. Check your /etc/apt/sources.list, it should contain a line like this:
deb http://deb.debian.org/debian/ trixie main contrib non-free non-free-firmware
After apt update, install the driver and firmware:
sudo apt install linux-headers-$(uname -r) build-essential dkms
sudo apt install nvidia-driver firmware-misc-nonfree
A reboot is needed for the kernel module to load. After that, run nvidia-smi for a quick check. It should show the card model, its driver version, and current power/temperature. If it doesn’t, you might have Secure Boot enabled (check with mokutil --sb-state) - if that’s the case, see below.
Option 2: NVIDIA-provided driver
NVIDIA runs an apt repository containing a newer driver (plus CUDA). If you want to use it, but you had the Debian-provided driver installed, it’s crucial to remove it first: dpkg --purge nvidia-kernel nvidia-kernel-dkms. Otherwise, there will be conflict and you might end up with neither GPU driver working properly. If you didn’t have a driver, skip this step.
Next, you need to add the NVIDIA repo - the easiest way is to install one .deb file manually. Finally, install the driver.
  wget https://developer.download.nvidia.com/compute/cuda/repos/debian13/x86_64/cuda-keyring_1.1-1_all.deb
  dpkg -i cuda-keyring_1.1-1_all.deb
  apt update
  apt install cuda-driver
As with the other driver: reboot and verify with nvidia-smi
Possible problem: nouveau module
Nouveau is an open-source driver for NVIDIA GPUs. It supports standard display functions, partially support the more advanced things one might need from the graphics adapter (3D, video decoding). But it doesn’t do CUDA at all.
The driver is a standard part of the Linux kernel, the system would prefer it over the proprietary driver if not configured otherwise. And usually, it will be automatically configured otherwise - driver package will create file /etc/modprobe.d/nvidia.conf containing blacklist nouveau (plus other lines, relevant for your GPU).
But sometimes, maybe when dpkg is stopped in the middle or there’s some other edge case, you might end up with /etc/modprobe.d/nvidia.conf.dpkg-new instead. It happens to me more than once. In nvidia-smi doesn’t work, lsmod | grep nouveau is one of my first debug steps.
Bundled tools
The driver package also contains a few utilities:
nvidia-smi- the only one that I really need. I’ll cover it later.nvidia-settings- a GUI for fan curves, overclocking, and display configuration. Built for desktop use, not much use on a headless server.nvidia-persistenced- a daemon that keeps the driver loaded between uses.nvidia-modprobe- loads the kernel module and creates device nodes with the right permissions, mostly invoked automatically by other tools rather than run directly.nvidia-bug-report.sh- gathers diagnostic information if you want to open a support request to NVIDIA.
Signing the driver for Secure Boot
If Secure Boot is enabled in UEFI settings, the Linux kernel automatically enters lockdown mode, meaning it will refuse to load unknown kernel modules. The system will boot, but the NVIDIA driver won’t be loaded. Everything that came with Debian is signed, but not the modules that get compiled on each machine. The NVIDIA driver is one of those.
Disabling Secure Boot in UEFI setup is the easiest option. In fact, probably the most popular in the real world, few people worry about hardening the boot process of machines kept in the datacentres.
But let’s do it by the book, for education. It’s not that hard. A few extra (and slightly awkward) steps during the first installation, on updates, the driver will be signed automatically.
I actually do it with an Ansible playbook - see Secure Boot and driver signing. But if you configure your machines manually, here’s how to do it.
First, generate a signing key and a self-signed certificate. A hundred-year expiry is the usual convention here (although I don’t think I’ll keep using this machine in the 22nd century). The certificate is for local use only, so no need to worry about rotation.
sudo mkdir -p /var/lib/dkms
cd /var/lib/dkms
sudo openssl req -new -x509 -newkey rsa:2048 -keyout mok.priv -outform DER -out mok.der -nodes -days 36500 -subj "/CN=DKMS module signing/"
Enrol the certificate as a Machine Owner Key. This asks for a one-time password. You’ll need it at the next boot:
sudo mokutil --import /var/lib/dkms/mok.der
Tell DKMS to use this key and certificate for everything it signs from now on (so you don’t need to repeat the manual process on updates):
echo 'mok_signing_key="/var/lib/dkms/mok.priv"' | sudo tee -a /etc/dkms/framework.conf
echo 'mok_certificate="/var/lib/dkms/mok.der"' | sudo tee -a /etc/dkms/framework.conf
The next boot will take you into MokManager - it runs before GRUB. Choose “Enroll MOK”, then “Continue”, then enter the password from the previous step. If you skip it, the system will boot but NVIDIA driver still won’t be accepted.
After that, rebuild the module and check if it’s signed:
sudo dkms install nvidia/$(dkms status | grep -oP 'nvidia/\K[0-9.]+' | head -1)
modinfo -F signer nvidia
That last command should print the certificate’s CN from the first step.
Installing the NVIDIA Container Toolkit
Some software on my home servers - especially the experimental stuff I’m installing and removing - runs in Docker. I want containers to be able to see the GPU. That’s what the NVIDIA Container Toolkit is for. It’s available as a deb package, there’s even an apt repository:
curl -fsSL https://nvidia.github.io/libnvidia-container/gpgkey | \
  sudo gpg --dearmor -o /usr/share/keyrings/nvidia-container-toolkit-keyring.gpg

curl -s -L https://nvidia.github.io/libnvidia-container/stable/deb/nvidia-container-toolkit.list | \
  sed 's#deb https://#deb [signed-by=/usr/share/keyrings/nvidia-container-toolkit-keyring.gpg] https://#g' | \
  sudo tee /etc/apt/sources.list.d/nvidia-container-toolkit.list

sudo apt update
sudo apt install nvidia-container-toolkit
Then reconfigure Docker runtime:
sudo nvidia-ctk runtime configure --runtime=docker
sudo systemctl restart docker
A quick test that a container can see the card:
docker run --rm --gpus all nvidia/cuda:12.6.0-base-ubuntu24.04 nvidia-smi
If that prints the same output as the host’s nvidia-smi, containers can use the GPU.
Enabling CDI mode
Docker’s --gpus flag above is a Docker-specific mechanism that works for a plain docker run. But it doesn’t help when I want to run a container runtime inside a container. Which is exactly the situation with my Minikube.
That’s what CDI (Container Device Interface) is for. It’s a specification, defined by CNCF and read by all modern container runtimes (Docker, containerd, CRI-O). Generate the spec with:
sudo nvidia-ctk cdi generate --output=/etc/cdi/nvidia.yaml
This writes a YAML file describing the GPU as one or more named devices - nvidia.com/gpu=0, nvidia.com/gpu=all, and so on. From here, anything that understands CDI can request nvidia.com/gpu=all and get a working GPU.
You need to generate the spec every time the NVIDIA driver is updated. I used Ansible and prepared a handler to run the command when the driver changes.
Monitoring the GPU
More about nvidia-smi
When I work with GPU servers, I use this command all the time. The default screen (showing current temperature, power draw, fan speed etc.) is the most useful, but there’s more to it.
A live view. nvidia-smi -l 1 works like top, it refreshes the summary every second. Useful while a stress test or a training run is going.
Why the clocks dropped. nvidia-smi -q -d CLOCK includes a “Clocks Throttle Reasons” section with fields like SW Thermal Slowdown (running hot, but not dangerously) and HW Slowdown (hardware problems - overheating or a voltage drop when the PSU can’t supply enough power). That’s the direct way to check the thermal-throttling concern from part 1’s mining section, rather than inferring it from temperature alone.
Setting power limits. sudo nvidia-smi -pl <watts> sets a power cap below the card’s default. Useful if your PSU is a bit short on power.
Running dcgm-exporter in Docker
DCGM (Data Center GPU Manager) is NVIDIA’s own GPU monitoring stack, and dcgm-exporter is its Prometheus-format wrapper. It reads the driver through the same NVML library nvidia-smi uses, but exposes more metrics (some of them not useful for consumer cards - ECC errors, NVLink stats).
It runs as just another container, using the GPU passthrough. Note that GPU access is not exclusive - the monitoring container won’t block another container from using the GPU.
docker run -d --restart unless-stopped \
  --gpus all \
  --cap-add SYS_ADMIN \
  -p 9400:9400 \
  --name dcgm-exporter \
  nvcr.io/nvidia/k8s/dcgm-exporter:3.3.5-3.4.1-ubuntu22.04
--cap-add SYS_ADMIN is needed for the profiling metrics (NVLink, some utilisation counters) that DCGM reads through performance counters rather than plain NVML calls. Without it the container still starts and exports the basic fields, just with a warning in the logs about the ones it can’t reach.
Metrics are exposed on /metrics on port 9400, in Prometheus format:
curl -s localhost:9400/metrics | grep DCGM_FI_DEV_GPU_UTIL
Point Prometheus at it like any other scrape target:
scrape_configs:
  - job_name: dcgm-exporter
    static_configs:
      - targets: ["localhost:9400"]
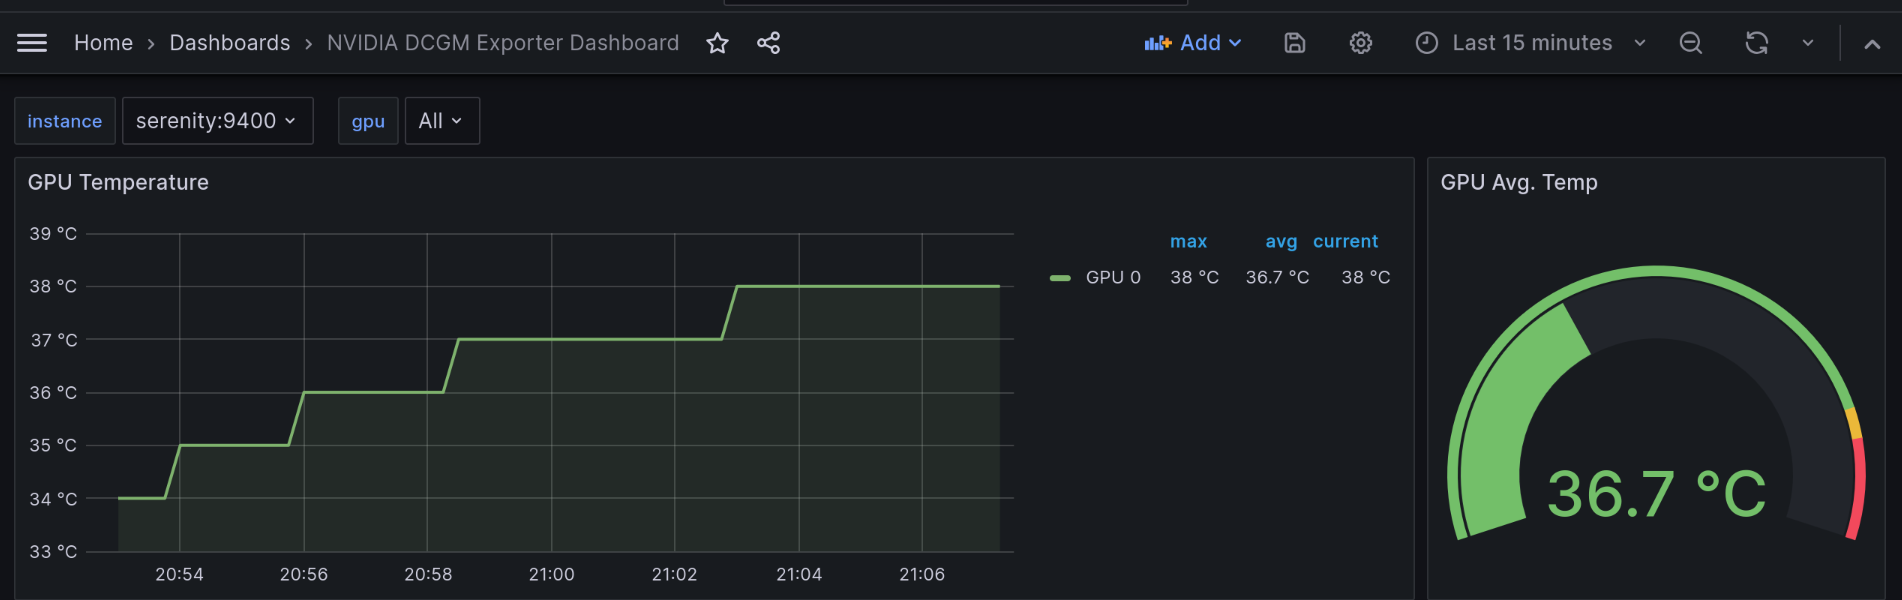
From there it’s the same Prometheus and Grafana setup already covered. NVIDIA publishes a Grafana dashboard (ID 12239). At work, I also built a quick overview dashboard for all servers’ CPU, GPU and RAM utilisation. ML researchers kept looking at it all the time.
What about multi-GPU?
There’s almost no change for multi-GPU setup:
- Driver installation and Secure Boot signing are identical regardless of card count.
- You can use an extra flag for Docker instead of simple –gpus all if you want to select a specific GPU, e.g.
--gpus '"device=0,1"' nvidia-smi topo -mshows whether multiple cards talk over PCIe or NVLink, which matters for how well multi-GPU workloads scale.- The CDI spec generated earlier already lists every GPU as its own named device.
- Kubernetes’ device plugin hands out whole GPUs by default; splitting one physical GPU into isolated slices (MIG) is only possible on datacentre-class cards.
- dcgm-exporter already labels metrics per-GPU, no change needed (if you run it with –gpus all).