DHCP is a necessary component of the home network. You probably don't want to manually assign IPs. It would be quite inconvenient on the laptop that travels between several networks, even more on the smartphone. On IoT devices lacking proper screens and keyboards, it's plain impossible.
If all you have are client devices, you don't need to know what IPs are assigned. Perhaps the address of the router to occasionally log in to its web interface, but that's it. Most people don't know the IP of their computer or tablet and rightly so.
It all changes when you want to run servers. There are ways to find services on the local network, such as mDNS and WS-Discovery, but let's face it: at some point, you'll need to point your browser or SSH client at a specific IP. So it's important that it doesn't change.
Of course, every home router contains a DHCP server which allows setting some addresses as static. It's often a good choice. There's one important advantage of keeping your DHCP server on the router: fewer points of failure. DHCP is needed for the network to function and so is the router, if they're the one, that's only one device that really needs to work all the time. But a good reason to move DHCP out of the router is the possibility to backup configuration. Are you going to keep using the same router? I certainly don't, as the one I got from my internet provider is terrible and I'm going to replace it soon. I don't want to configure all the addresses manually again and home routers don't allow to export/import DHCP configuration, certainly not between the different brands.
So I decided to run my own DHCP server as a first step before I start running servers. But why would I type IPs, when I could use local DNS? And if I have a DNS for the local network, it can also cache internet addresses. A typical website fetches content from 10 or more different servers, so there's a noticeable difference when the DNS replies in 2 milliseconds as opposed to 200 milliseconds. I could use bind and isc-dhcpd like I did in the past when configuring "real" networks, but there are servers more tailored to the needs of home users.

Pi-hole was designed as a DNS sinkhole - a server that can block some content by replying "address unknown". Typical use is blocking ads and tracking: on websites, but also in mobile applications and IoT devices that can't use traditional ad-blocking software. It can also be used to increase security by blocking some malware that relies on DNS, blocking fraudulent websites, etc. - it all depends on the blocklists loaded and there are many to choose from. Non-blocked queries are forwarded to external DNS servers and then cached. There's also a possibility to add local addresses and an optional DHCP server. So it's the extra functionality that first caught my attention and the core functionality is for me a nice addition.
Choosing hardware
Pi in Pi-hole comes from Raspberry Pi, but the software can run pretty much everywhere where you can run Linux. I did my first experiment using Docker on my homelab server, but I quickly thought that Raspberry Pi is indeed a better option. Not because there was anything wrong with the Pi-hole itself, but DHCP and DNS are such important pieces of infrastructure they really should run on a separate device. A homelab server is, by definition, something for experiments, you often need to reboot it and sometimes feel a need to rebuild it from scratch. Plus, if Pi-hole crashes (it never happened so far and I've been running it for months) when I'm away, it can be rebooted by pulling a plug.
So, Pi it is. They are currently hard to get or outrageously priced, but luckily I had one unused Pi 2 in the drawer. It's 7 years old, with a performance way below current models, but more than enough for the job.
Installing OS
The official operating system is Raspberry Pi OS, formerly called Raspbian. It's a port of Debian, my favourite distro. Perfect. I chose a 32-bit version (64-bit requires Pi 3 or 4), Lite edition, meaning no GUI. Unlike the PCs, on machines like this, you don't use the installer. Instead, you write the image to the micro-SD card using another computer. There is a special tool for that called Raspberry Pi Imager. It simplifies downloading and writing and even allows to do some customization. I chose the old school way - downloaded the image myself, wrote it with dd and customized the system later, but that's because I like the old way.
Initial configuration
My system is going to run headless, but I have to do the initial configuration. There are two options: you can temporarily connect a keyboard and monitor, during the first boot you'll answer a few questions. Or you can mount the micro-SD card on the PC and modify a few config files. There's a third option of using Raspberry Pi Imager, but I already skipped this. Since I like editing config files and I'm too lazy to go to another room and fetch an HDMI cable, I chose the second option. Again, feel free to use the other two if you don't feel like manually editing configs.
There are two partitions on the micro-SD card, bootfs and rootfs. All I had to do was these 3 steps:
- on bootfs, create a file called ssh or ssh.txt, it can be empty or has any content, just the presence of this file informs the system to start the SSH server,
- also on bootfs, create a file called userconf.txt containing a username and an encrypted password separated by a colon, to encrypt the password you use the command: openssl passwd -6
- on rootfs (not bootfs this time!), edit file etc/dhcpcd.conf to provide network information (since the Pi is going to run the DHCP server, it obviously cannot get the configuration from DHCP)
cd /media/igor/bootfs
touch ssh
openssl passwd -6
vim userconf.txt  # add the line below
igor:I'mNotShowingMyPasswordHereEvenIfItIsEncrypted/
cd /media/igor/rootfs/etc
vim dhcpcd.conf
# add lines
interface eth0
static ip_address=192.168.1.3/24
static routers=192.168.1.1
static domain_name_servers=192.168.1.1 1.1.1.1
Note that I'm not using localhost as the DNS server - not yet!
I replaced the micro-SD card, connected Pi to LAN and powered it up. A few seconds later it's available on the network. I could log in with SSH and update packages. It takes much longer than on the PC (SD cards are slow).
Installing Pi-hole
The recommended method is:
curl -sSL https://install.pi-hole.net | bash
but I prefer to see the script before running it, so I chose alternative method 2:
wget -O basic-install.sh https://install.pi-hole.net
less basic-install.sh
sudo bash basic-install.sh
The installation script supports several operating systems and uses the distro's package manager to install most of the software: lighttpd and a few PHP packages for the web interface, git to download the core part of Pi-hole and some supporting tools. We need to confirm the system uses static IP and answer some very important questions (but don't worry, you can change all the settings later):
Privacy versus security
Do you want to keep logs of the DNS queries? It can be useful to see the activity on the network, eg. to debug something or to find malware. But it also means you're logging all websites visited by you and other people in your home. Do you want it? I don't. Another problem with query logging is the size of logs - you're going to run out of disk space soon and you'll quickly wear out the SD card.
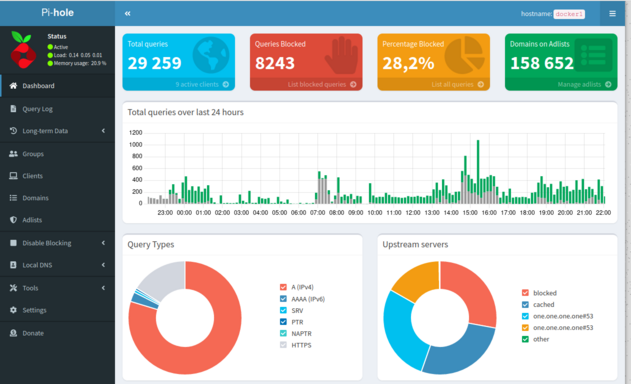
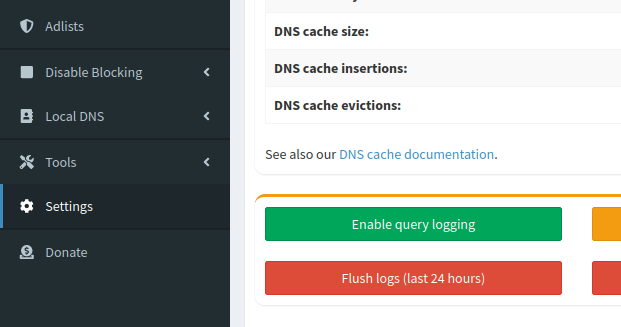
My recommendation: answer "yes" during installation, but only keep this option on for a few minutes, to see that everything is running fine. Then, log in to the web interface, choose Settings/System, "Disable query logging", then "Flush logs" to delete those already written. Pi-hole will only keep completely anonymous statistics, eg. how many clients are connected and how many DNS queries were sent.

Warning, there's another option in Settings/Privacy to disable displaying some private information, but if you don't disable logging, it will still be written.
Choosing upstream DNS
Another important option during installation is the upstream DNS or the server to which the Pi-hole will forward the queries. Again you should consider privacy. A popular option is Google, the server is fast and its IP is easy to remember (8.8.8.8), but don't you think Google already knows too much about you?
I think there are two good options. One, choosing "custom" and entering the servers of your internet provider. After all, the provider already knows where you connect and the servers are close to you (I'm talking about network distance here, how many devices are between you and the server), so quite fast. However, in many countries providers are required by law to filter some domains and you might not like it. Some providers even use DNS for more controversial purposes - if you type a non-existent domain, instead of returning an error, they will redirect you to a website showing ads. It's annoying in the browser and could completely mess up other software.
That's why the other option is even better: Cloudflare and the famous "1.1.1.1" server. It's blazingly fast, faster than Google and likely faster than your provider, despite being further from you. What's even more important, Cloudflare doesn't log DNS queries. They have regular external audits to prove it.
Confguring DHCP
There needs to be exactly one DHCP server on the home network. Less than that and the devices won't get an IP address and won't connect. More than that, they will get confusing replies and likely also won't connect. Luckily, once the device gets the network configuration, it will keep it until it expires, so changing the DHCP server is simple and safe, provided that you do it in the correct order:
- log in to the router and P-hole web UI,
- check the DHCP settings on the router, but don't disable it yet,
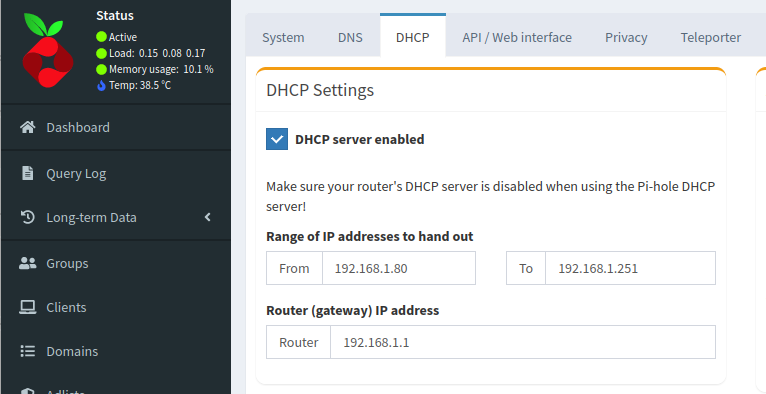
- enter the same settings on the Pi-hole (except for DNS, which should be the address of the Pi-hole), but don't enable DHCP yet,
- now, disable DHCP on the router and quickly, before someone complains that the network doesn't work, enable it on the Pi.

It's a good idea to test. Get another device (not the one connected to the router and Pi) and force it to renew the IP, for example by enabling and disabling airplane mode. You should see a client appearing on the Pi-hole DHCP server and DNS queries showing up on the dashboard.
Some time later, you will see the "Currently active DHCP leases" list getting longer. On the right of every entry, you can see two icons. One to remove the device and the other to set a static lease (permanent address). It's a bit unintuitive: clicking this will move the entry to the list below (Static DHCP leases configuration), but you need to click the + button next.
Filtering
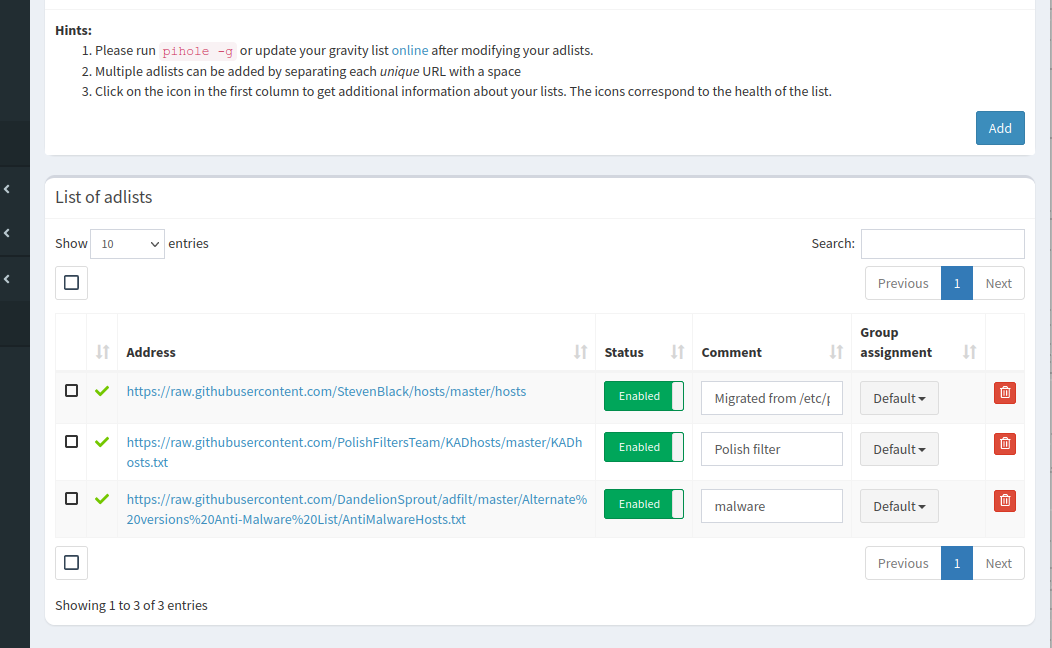
Filters are configured in the Adlists tab. The default list is quite lax. I think that is right. If you use a browser extension such as uBlock Origin, you can be aggressive in your filtering: if it causes a website to stop functioning properly, it's easy to unblock. In Pi-hole that's more hassle, plus it's filtering for the whole network which is probably used by less-technical users as well.
What can we do if Pi-hole breaks the website (or we suspect that it does)? There are two options. Quick one: click "disable blocking". Precise one, see option "domains" in the left menu. You can use it to add a domain to a whitelist or blacklist, using ordinary text or regular expressions.
Filtering with DNS is not as effective as using a browser extension. You can't block https://example.com/ads/ while leaving the rest of https://example.com/ . Of course, you can use both. Pi-hole can also increase security. Some malware connects to a specific domain. There are also lists of domains used by scammers - fake lotteries, SMS subscriptions, etc. Since I also visit Polish websites, I use a list that also includes Polish domains: https://raw.githubusercontent.com/MajkiIT/polish-ads-filter/master/polish-pihole-filters/KADhosts.txt

Local DNS
Recommended domain for local use is home.arpa- not localdomain or example.com that many people use. To be fair, in most cases nothing bad would happen, but let's do it by the book. Simply add your devices in Local DNS -> DNS Records. Pity there's no option to automatically populate local DNS with DHCP entries.
Backup
I usually use Ansible to configure services, but this time I decided it was not worth it. You only configure Pi-hole once, no configuration can be shared with other servers. It's much faster to use a web UI.
But it's always a good idea to have backups. There are two ways to do it, for slightly different purposes. One is the option Teleporter in Settings. It allows you to save or revert configuration. It generates a small file containing things like DHCP and DNS settings, blocklists URLs (but not the blocklists), manually added entries. It's useful if you mess up the configuration or need to move the config to another device.
The second option is to make an image of the micro-SD card. Take it out of Raspberry Pi, insert it into the reader, check (eg. with lsblk) which device name it got (I'll use sde in the example):
dd if=/dev/sde bs=10M status=progress conv=fsync | gzip > raspbian-pihole.img.gz
It writes a backup of the whole operating system. Useful if you break something on this level or your micro-SD card stops working. You can restore it with:
zcat raspbian-pihole.img.gz | dd of=/dev/sde bs=10M status=progress conv=fsync
If you don't know dd, the options are:
- if is the input file, stdin by default
- of is the output file, stdout by default
- bs stands for block size, set it to something large like 1M or 10M (probably no difference between the two, but the default is only 0.5KB) to increase throughput
- conv=fsync ensures that data and metadata are really written before the program exits,
- status=progress shows progress.
It's enough to write it once, maybe repeat it occasionally (eg. once a year or before/after an OS upgrade).